Getting Started with ClaroGrid
A step-by-step guide to editing your Shopify products faster and safer.
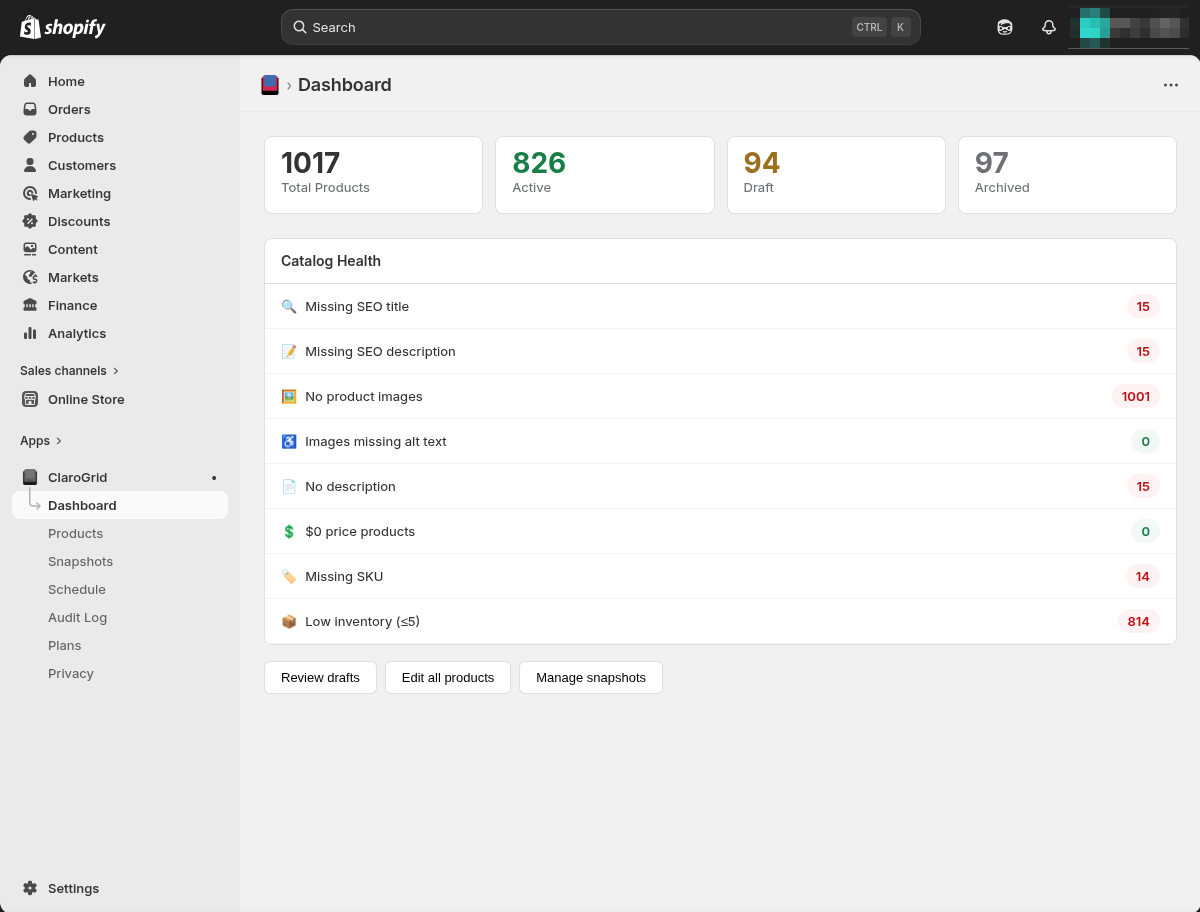
1Getting Started
- Install ClaroGrid from the Shopify App Store and open it from your Apps sidebar.
- The Dashboard shows your catalog health at a glance — missing SEO titles, products without images, low inventory, and more. Click any issue to jump directly to those products.
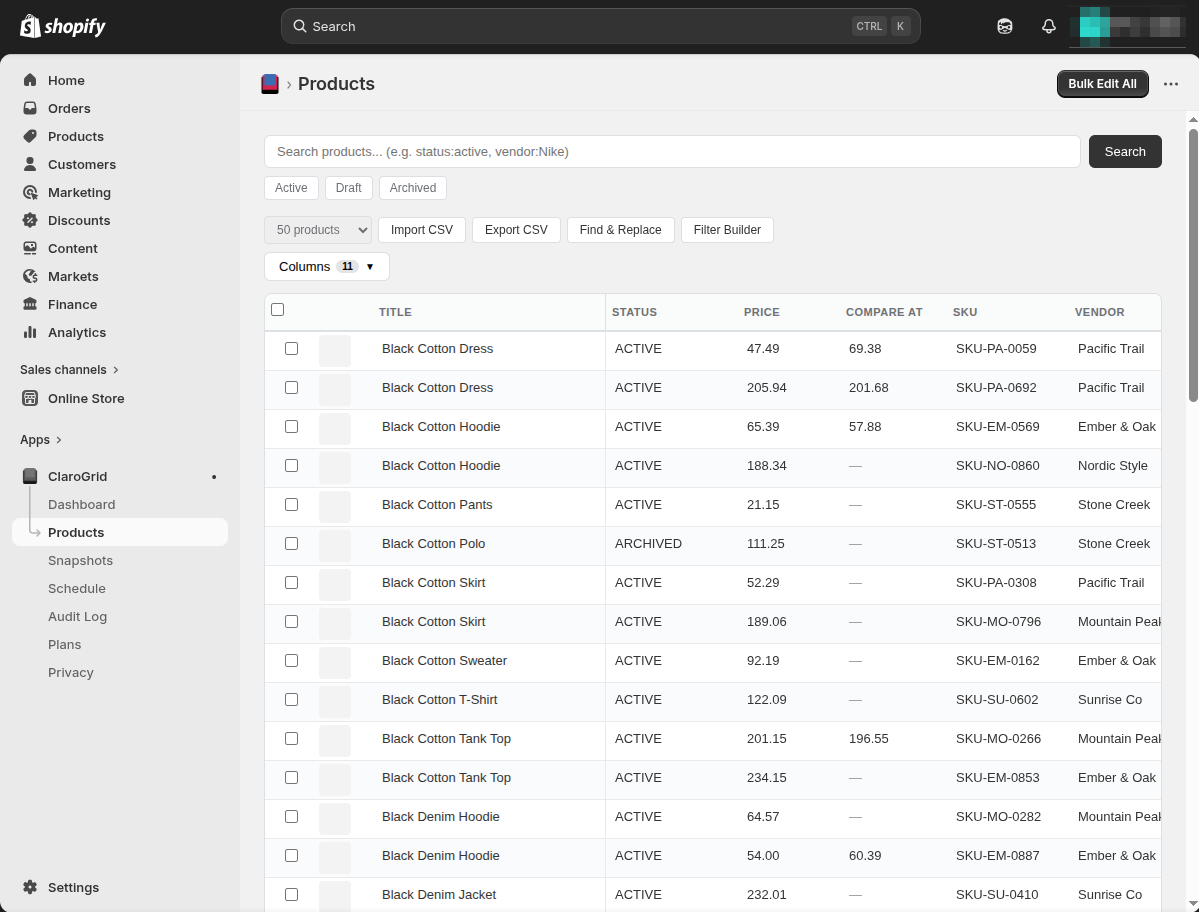
2Editing Products
- Click Products in the sidebar to open the grid editor.
- Click any cell to edit it — prices, titles, tags, status, vendor, SKU, and more. Press Enter to save.
- Use the Columns dropdown to show or hide columns. The grid defaults to 4 columns for a clean view.
- Use the page size selector to load 50, 100, 150, or 250 products at a time.
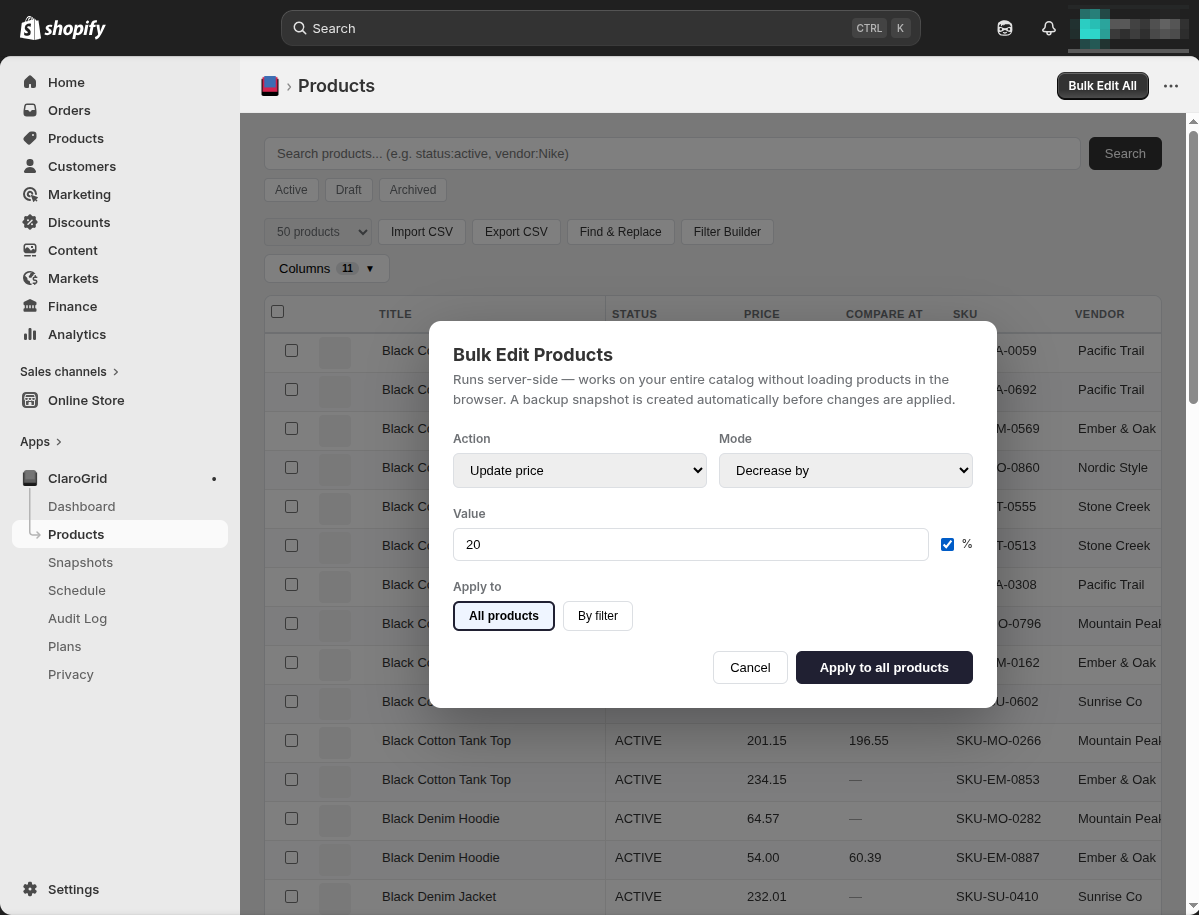
3Bulk Editing
- Select products using the checkboxes on the left. A bulk action bar appears at the top.
- Choose an action — update price, set status, add tags, change vendor, and more.
- A preview shows exactly what will change before you commit. Uncheck any products you want to exclude.
- For store-wide changes, click Bulk Edit All in the header. This runs server-side and works on your entire catalog without loading products in the browser. Filter by status, vendor, product type, or tag.
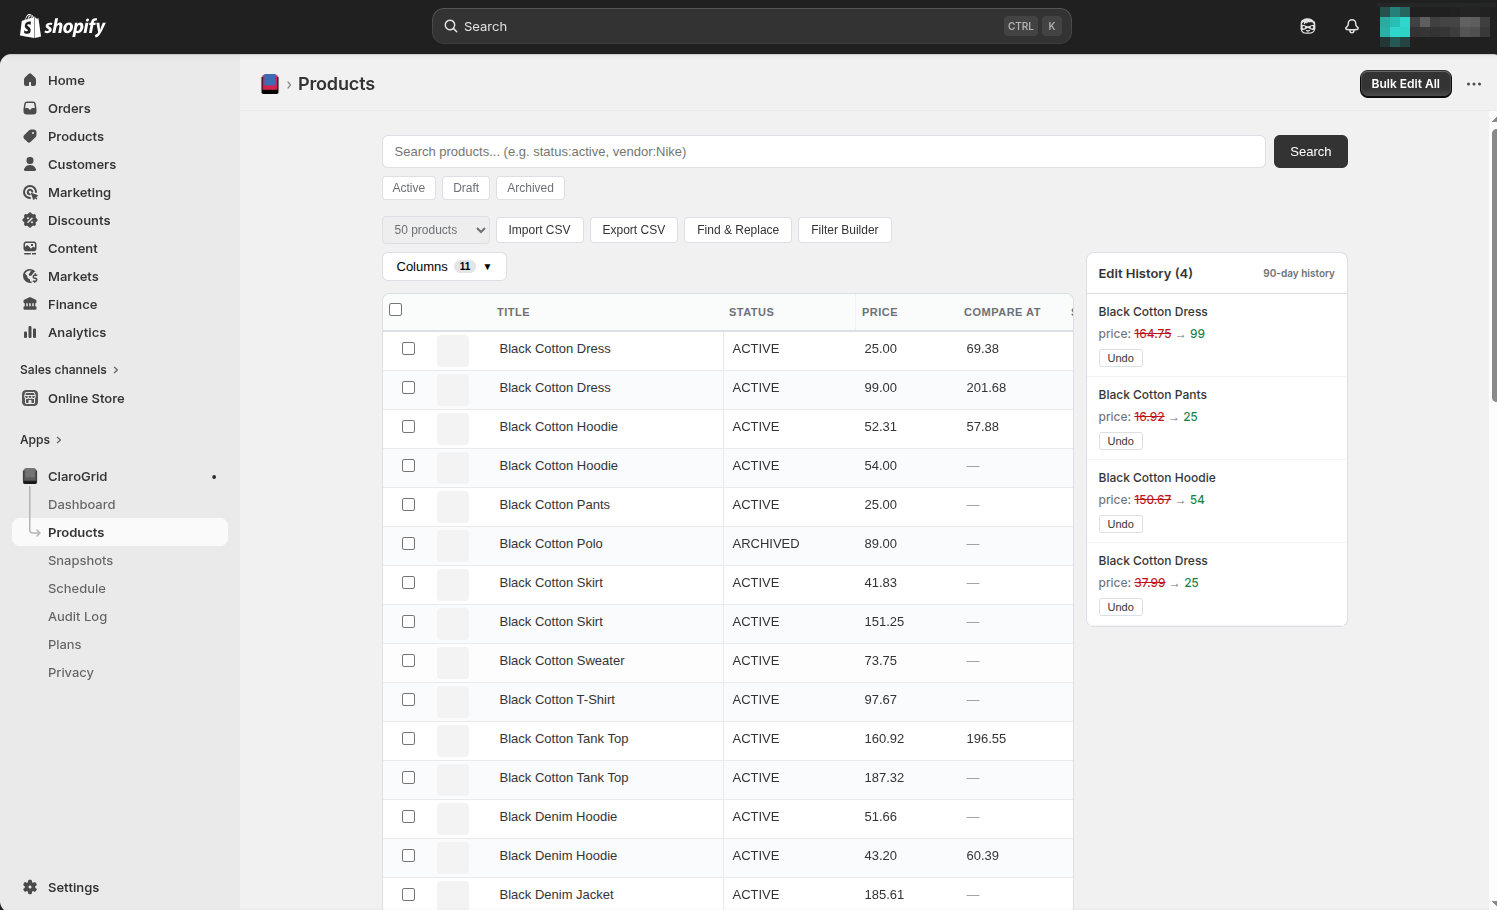
4Undo and History
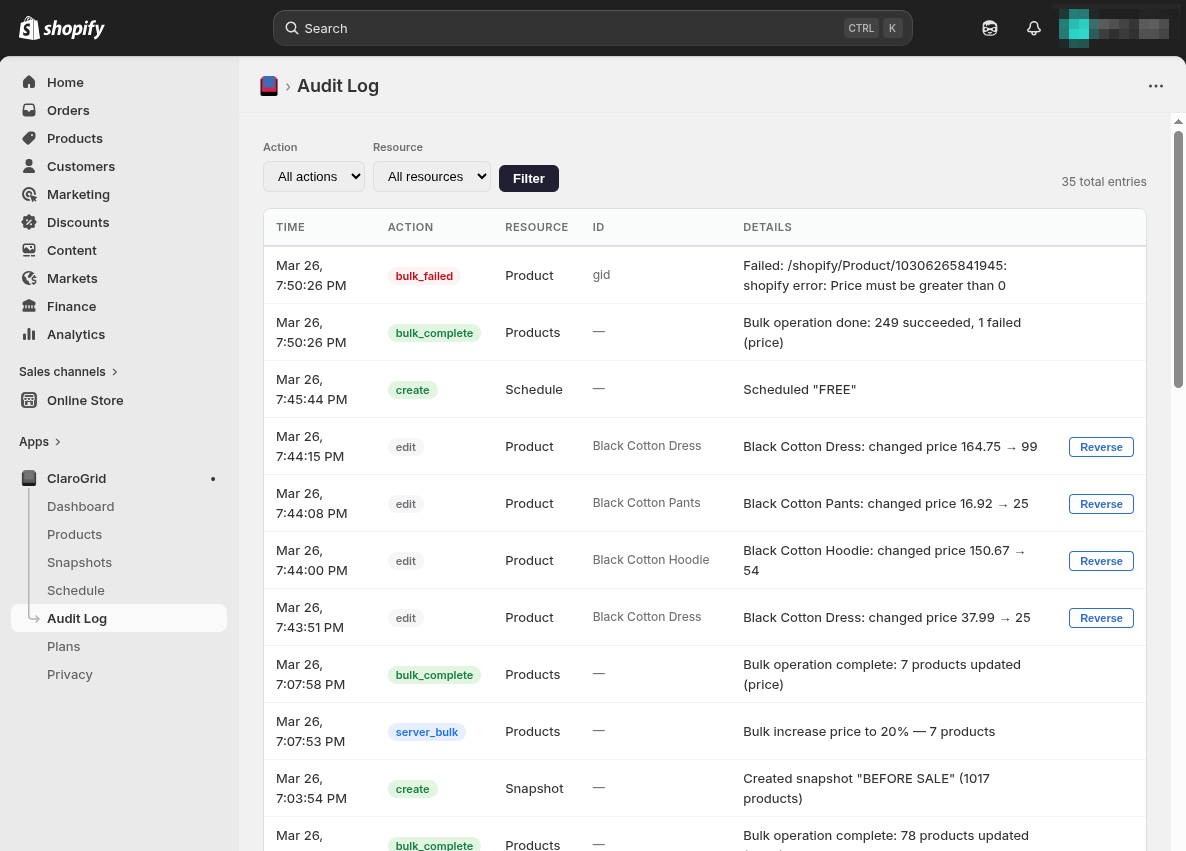
- Every edit appears in the Edit History sidebar on the right. Click Undo on any entry to reverse it.
- The Audit Log page shows a complete record of every change made in ClaroGrid. Each entry has a Reverse button to restore the previous value.
- Undo history is retained for 7, 30, or 90 days depending on your plan.
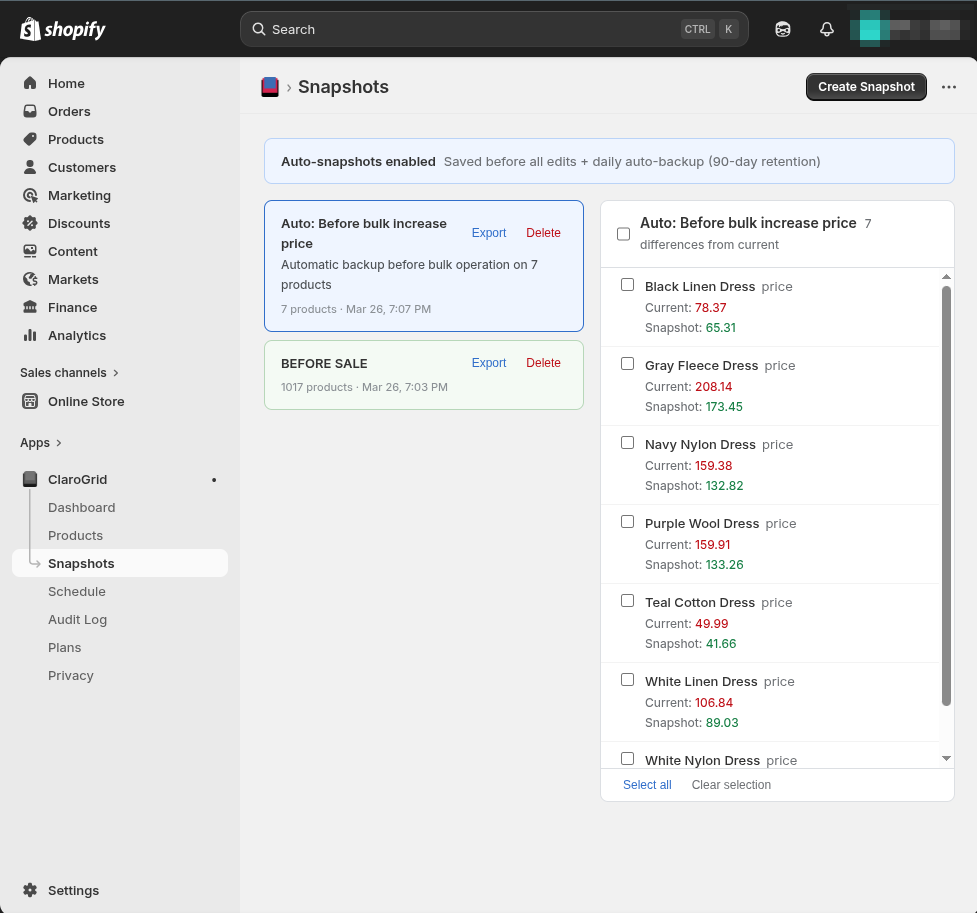
5Catalog Snapshots
- Go to Snapshots and click Create Snapshot. Enter a name like "Before Black Friday" and click Save.
- ClaroGrid captures the state of every product in your catalog.
- After making changes, click your snapshot to see a diff — every field that changed is highlighted with before and after values.
- Select the changes you want to restore and click Restore. You can restore everything or just specific products.
- Automatic backup snapshots are created before every bulk operation and scheduled change.
6Scheduling Operations
- Go to Schedule and click Schedule Operation.
- Choose an action, set the date and time, and pick which products to target.
- The operation runs automatically at the scheduled time. A backup snapshot is created before every scheduled change.
- Completed operations appear in the History section with an Undo button to reverse the entire operation.
7Audit Log
- The Audit Log records every action taken in ClaroGrid with timestamps.
- Each product edit shows the product name, field changed, old value, and new value.
- Click Reverse on any entry to restore the previous value instantly.
- Filter by action type to find specific changes quickly.
8CSV Import and Export
- Click Import CSV in the toolbar to upload a CSV file.
- ClaroGrid auto-maps columns and shows a preview with validation. Errors are flagged before anything is applied.
- Click Export CSV to download your products. The export respects your current filters and column selection.
9Find and Replace
- Click Find & Replace in the toolbar.
- Enter a search term and replacement. Choose which field to search in.
- Preview all matches before applying. Works across your entire visible product set.